
How to connect MacBook Air to a monitor
How to connect MacBook Air to a monitor
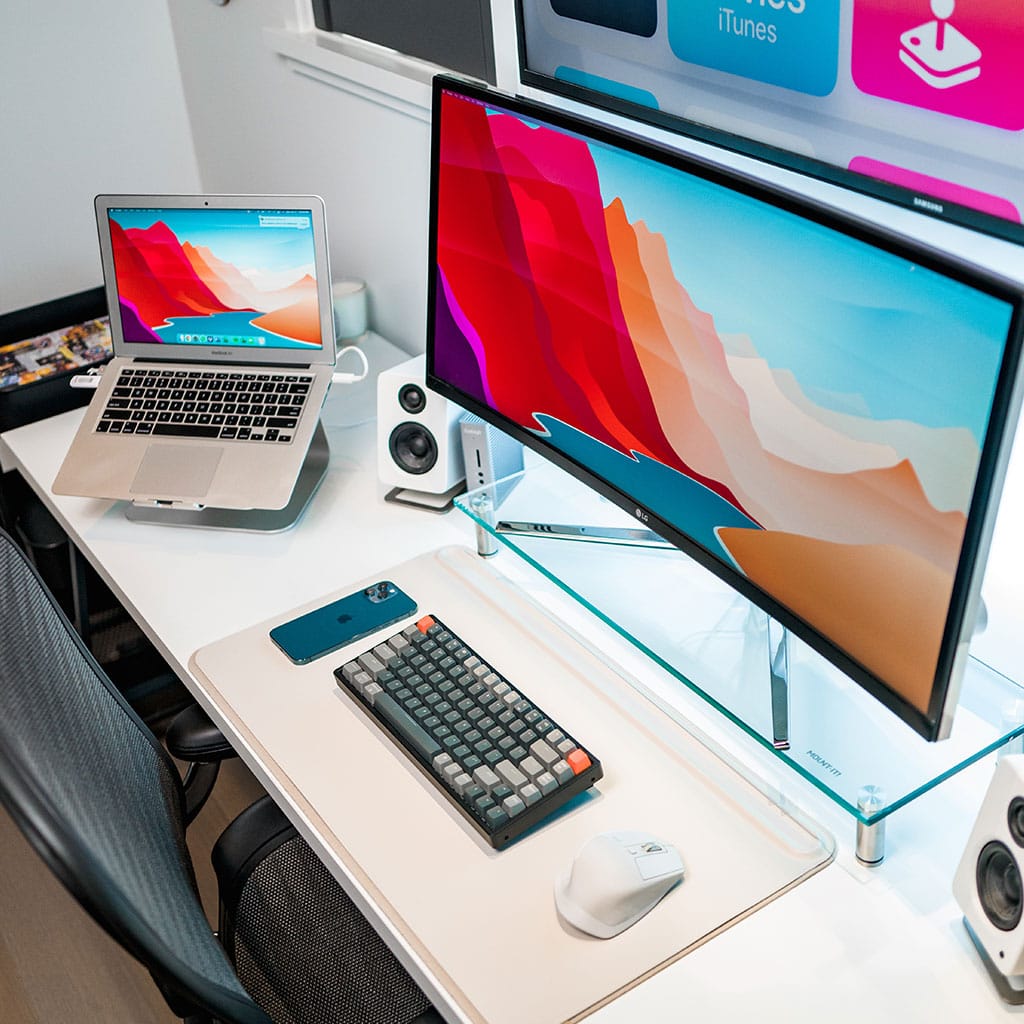
Experience a world of limitless productivity and captivating visuals by seamlessly connecting your MacBook Air to an external monitor. This article guides you through the straightforward process of establishing a dual-screen setup, enhancing multitasking, expanding your digital canvas, and customizing your work environment.
Unleash the power of your MacBook Air by connecting it to a mesmerizing monitor!
Connecting a MacBook Air to an external monitor can increase productivity, offer more screen space, and enhance multitasking abilities. Here’s a detailed guide on how to achieve this:
- Check Monitor Compatibility and Ports:
- Ensure your external monitor is compatible with your MacBook Air. Check for supported resolutions and refresh rates.
- Identify the available ports on both your MacBook Air and the monitor. Common ports include HDMI, DisplayPort, USB-C, Thunderbolt 3, and VGA.
- Choose the Right Cable or Adapter:
- Discover the perfect cable or adapter to seamlessly connect your MacBook Air to the monitor, unlocking a world of possibilities with the ports at your disposal!
- For example, if both devices have USB-C/Thunderbolt 3 ports, you can use a USB-C to USB-C cable. If not, you might need an adapter or dongle.
- Connect the Cable or Adapter:
- Connect the cable from your MacBook Air to the monitor. Plug one end into your laptop and the other end into the monitor.
- If you’re using an adapter, connect it to your MacBook Air first, and then connect the cable to the adapter.
- Power On the Monitor:
- Turn on the external monitor and ensure it’s set to the correct input source (e.g., HDMI, DisplayPort). Some monitors might require manual input selection.
- Configure Display Preferences on MacBook Air:
- On your MacBook Air, go to “System Preferences” > “Displays.”
- In the “Arrangement” tab, you can arrange the displays as per your preference (extend or mirror).
- Adjust Display Settings:
- In “Display” settings, you can adjust the resolution, refresh rate, and other display preferences. Choose settings that best suit your monitor’s capabilities and your visual comfort.
- Optimize Display Arrangement:
- Drag and arrange the virtual displays in the “Arrangement” tab to match the physical layout of your monitors. This ensures smooth movement between screens.
- Customize Monitor Settings:
- Some monitors have their own settings that can be adjusted for color accuracy, brightness, contrast, and more. Refer to the monitor’s user manual for guidance.
- Sound Output and Accessories:
- If your monitor has built-in speakers, you might need to select it as the sound output device in the “Sound” settings on your MacBook Air.
- Consider connecting any accessories you want to use, such as a keyboard, mouse, or external hard drive.
- Test and Fine-Tune:
- Test the setup by moving windows between your MacBook Air’s screen and the external monitor.
- Fine-tune settings as needed for optimal viewing comfort and productivity.
Remember that the specific steps might vary based on the MacBook Air model, monitor, and ports available. If you encounter any issues, consult the user manuals for both your MacBook Air and the monitor, or refer to Apple’s support resources. By following these steps, you can seamlessly connect your MacBook Air to an external monitor and enjoy an expanded, more efficient workspace.
What types of ports are available on your MacBook Air and the monitor?
Both your MacBook Air and the monitor likely offer a range of ports to facilitate connectivity and seamless integration. The MacBook Air, depending on the model, may feature USB-C/Thunderbolt 3 ports, which are versatile and can support various functions including data transfer, video output, and power delivery. Additionally, some older MacBook Air models might include Mini DisplayPort or even VGA ports for video output. USB-C ports on the MacBook Air are particularly noteworthy as they support high-speed data transfer and video output through compatible cables and adapters. These ports might also serve as power sources for charging the MacBook Air while connected.
On the monitor side, the available ports may vary based on the model and manufacturer. Common ports you might encounter include HDMI, DisplayPort, and USB-C/Thunderbolt 3. HDMI is a widely used interface for transmitting both high-definition video and audio signals. DisplayPort offers similar capabilities and is commonly found on monitors as well. Some monitors also provide USB-C/Thunderbolt 3 ports that support video input, data transfer, and power delivery. If your monitor is equipped with a DVI port, VGA port, or Mini DisplayPort, you may need specific adapters or cables to ensure compatibility with the ports on your MacBook Air. Additionally, if you’re using a dock station, it might provide a variety of ports, including USB, HDMI, and Ethernet, to serve as a hub for multiple connections.
It’s important to identify the available ports on both your MacBook Air and the monitor to select the appropriate cable or adapter for establishing a connection. This consideration ensures seamless communication between your devices and maximizes the potential of your MacBook Air and external monitor setup.
What steps can you take if the connection isn’t working as expected?
If your connection between your MacBook Air and the external monitor isn’t functioning as expected, there are several troubleshooting steps you can take to identify and resolve the issue:
- Check Cable and Connections:
- Ensure that the cable or adapter you’re using is properly connected to both your MacBook Air and the external monitor. Sometimes, a loose or faulty connection can be the root cause.
- Try using a different cable or adapter if you have one available to rule out potential issues with the hardware.
- Restart Devices:
- Restart both your MacBook Air and the external monitor. Sometimes, a simple reboot can resolve connection glitches or software-related problems.
- Check Display Preferences:
- Go to “System Preferences” > “Displays” on your MacBook Air and make sure the correct display settings are configured. Ensure that the external monitor is recognized and set up as desired (extend, mirror, etc.).
- Test Different Ports:
- If your MacBook Air has multiple ports, try connecting the external monitor to a different port. This can help determine if the issue lies with a specific port on either the MacBook Air or the monitor.
- Monitor Input Source:
- Check that the external monitor is set to the correct input source (e.g., HDMI, DisplayPort) that corresponds to the cable you’re using. Some monitors have multiple input sources and need manual selection.
- Adapter Compatibility:
- If you’re using an adapter or dongle, ensure that it’s compatible with your MacBook Air and the monitor. Using a high-quality, Apple-certified adapter can prevent compatibility issues.
- Monitor Power and Signal:
- Ensure that the monitor is powered on and receiving power. Check for indicator lights on the monitor.
- If the monitor supports multiple inputs (e.g., HDMI and DisplayPort), try switching to a different input and then back to the desired input.
- Software Updates:
- Check for software updates for both your MacBook Air and the external monitor. Outdated software can sometimes lead to compatibility issues.
- Try a Different Monitor or MacBook:
- If possible, connect your MacBook Air to a different external monitor to see if the issue persists. Alternatively, try connecting your MacBook Air to a different computer or device to test the monitor’s functionality.
- External Monitor’s Manual:
- Refer to the user manual of the external monitor for troubleshooting specific to that model. Manufacturers often provide troubleshooting guidance for common issues.
- Apple Support Resources:
- If none of the above steps resolve the issue, consider seeking assistance from Apple Support or visiting an Apple Store for expert help.
By systematically troubleshooting the problem and checking various components, you can identify and resolve the issue that’s preventing the connection between your MacBook Air and the external monitor from working as expected.
How can you connect and configure other accessories, such as a keyboard, mouse, or external hard drive?
Connecting and configuring accessories like a keyboard, mouse, or external hard drive to your MacBook Air can enhance your productivity and extend your capabilities. Here’s how to set up these accessories:
Keyboard and Mouse:
Keyboard Connection: For a wired keyboard, connect it to a USB port on your MacBook Air. If you’re using a wireless Bluetooth keyboard, go to “System Preferences” > “Bluetooth” and pair the keyboard with your MacBook Air. Follow on-screen prompts to complete the pairing process.
Mouse Connection: Similar to a keyboard, you can connect a wired USB mouse directly to a USB port. For wireless Bluetooth mice, go to “System Preferences” > “Bluetooth” and pair the mouse. Some mice might require installation of additional software for customizable features.
External Hard Drive:
Connection: Connect the external hard drive to an available USB-C/Thunderbolt 3 port on your MacBook Air. The drive should be detected automatically and appear on your desktop.
File System Compatibility: Ensure that the external hard drive’s file system is compatible with macOS. Most drives are formatted in exFAT or FAT32 for cross-platform compatibility. If using a new drive, you might need to format it using Disk Utility.
Time Machine Backup: If you’re using the external hard drive for Time Machine backups, go to “System Preferences” > “Time Machine” and select the external drive as your backup destination.
Docking Stations and Hubs:
If you’re using a docking station or USB-C hub, connect it to your MacBook Air’s USB-C/Thunderbolt 3 port. These accessories can expand connectivity options, allowing you to connect multiple peripherals like monitors, keyboards, mice, external drives, and more.
Some docking stations might require specific drivers or software for optimal functionality. Check the manufacturer’s website for any required downloads.
Accessory Customization:
For keyboards and mice with customizable features, you might need to install specific software provided by the manufacturer. This software enables you to program shortcuts, adjust sensitivity settings, and personalize the behavior of these accessories.
Ejecting External Drives:
Before disconnecting an external hard drive, make sure to eject it properly. Click the eject icon next to the drive’s name in the Finder or right-click the drive and select “Eject.”
Access Permissions:
Some accessories or external drives might require access permissions. If prompted, grant necessary permissions for the accessory to function properly.
Remember to refer to the user manuals of your specific accessories for detailed setup instructions and any additional customization options. Configuring these accessories to work seamlessly with your MacBook Air can transform your computing experience and streamline your workflow.

Copyright © OurDeal. All right reserved.

You must be logged in to post a comment.